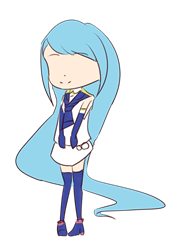
apricotモデル作成(その2)
その2です。
前回は最低限の機能を追加して終わりました。
今回は、出現時日時を喋る、まばたき、喋る動作、ダブルクリックをすると反応する機能を追加します。
まばたきは目を描いていない全体と、目のパーツが必要になってきます。
凝ったモーションを行おうとすればするほど、素材数が跳ね上がります。これは時間と相談しつつ、作っていきたいですね。
口は動かしてもいいのですが、今回は作りません。一気に素材の手間が増えてしまうので。
最終的な完成形はこんな形にします。

まずは素材を用意します(大変)


前回は1枚絵でしたが、分割しました。
目とそれ以外の画像座標はPhotoshopなどで見ます。
このとき、Neutralizeの記述を変更します。
    <sequence name="samidare.Neutralize">
      <motion fps="30" z-index="0">
        <image x="0" y="0" width="175" height="250">Images\samidare-base.png</image>
      </motion>
      <motion fps="30" z-index="1">
        <image x="37" y="35" width="65" height="60">Images\samidare-eye1.png</image>
      </motion>
    </sequence>
画像をベースと瞳の2枚使うので、それぞれ定義します。
z-indexはレイヤー階層です。数字が大きければ手前に来ます。
    <sequence name="samidare.Say">
      <motion fps="10" z-index="0" iterations="40">
        <image x="0" y="0" width="175" height="250">Images\samidare-base.png</image>
      </motion>
    </sequence>
喋るときはこのように記述します。ノーマライズの上体から瞳の変更は必要ないので体の記述だけ行います。(いらない?ノーマライズで事足る?)
    <sequence name="samidare.Blink">
      <motion fps="10" z-index="1" iterations="2">
        <image x="37" y="35" width="65" height="60">Images\samidare-eye1.png</image>
        <image x="37" y="35" width="65" height="60">Images\samidare-eye2.png</image>
        <image x="37" y="35" width="65" height="60">Images\samidare-eye3.png</image>
        <image x="37" y="35" width="65" height="60">Images\samidare-eye1.png</image>
      </motion>
    </sequence>
まばたきの場合はこのように記述します。
ノーマライズの体画像をそのまま使用するため、記述は瞳だけにしています。
iterations="2"
というのは、繰り返し回数です。
2と選択すると2回まばたきを行います。
    <sequence name="samidare.Shake">
      <motion fps ="10" z-index="0" iterations="3">
        <image x="0" y="-6" width="175" height="250">Images\samidare-base.png</image>
        <image x="0" y="-12" width="175" height="250">Images\samidare-base.png</image>
        <image x="0" y="-6" width="175" height="250">Images\samidare-base.png</image>
        <image x="0" y="0" width="175" height="250">Images\samidare-base.png</image>
      </motion>
      <motion fps="10" z-index="1" iterations="3">
        <image x="37" y="29" width="65" height="60">Images\samidare-eye3.png</image>
        <image x="37" y="23" width="65" height="60">Images\samidare-eye3.png</image>
        <image x="37" y="29" width="65" height="60">Images\samidare-eye3.png</image>
        <image x="37" y="35" width="65" height="60">Images\samidare-eye3.png</image>
      </motion>
    </sequence>
これはダブルクリックをしたときにピョンピョンするモーションです。
全体的に画像が移動するので、体と瞳の画像両方を記述しています。
ここまでがモーションの作成です。
モーション作成 → 動作タイミング
という順で作っていくのがいいのかな?
次に、動作タイミングに合わせたモーション定義を行ってきます。
<sequence name="samidare.Neutralize" />
Idle部分のモーションをまばたきのモーションに変更しました。
      <sequence name="samidare.Neutralize" />
      <message>五月雨って言います<break/>護衛任務はお任せください</message>
      <sequence name="samidare.Blink" />
起動時のモーションで喋った後、まばたきするようにしました。
Stop部分は変更点なしです。
    <sequence name="Tick" state="00:00:00">
      <message>{M月d日}です</message>
      <sequence name="samidare.Say" />
    </sequence>
これが起動時に時間を言ってくれる動作記述です。
これを記述すれば日時をお知らせしてくれます。
    <sequence name="DoubleClick">
      <sequence name="samidare.Shake" />
      <message>お任せくださいね!</message>
      <sequence name="samidare.Say" />
    </sequence>
これがダブルクリック時、モーションを起動するシーケンスです。
シーケンスタグは"DoubleClick"です。
シーケンスタグによってその時に反応する動作を作れます。
詳しくはリファレンスをご覧ください。
github.com
これでモデルが少しレベルアップしました。
今回はこれで終了です。
それではみなさん、楽しい創作ライフを!